I have always been a fan of cooking, and my Samsung microwave has been my trusty companion in the kitchen for the past few years. However, recently I noticed that the odor coming from my microwave was not as pleasant as it used to be.
After some research, I discovered that the charcoal filter in my microwave needed to be replaced. I was determined to do it myself and save some money by avoiding a service call.
So, I set out on a mission to learn how to replace the charcoal filter in my Samsung microwave. In this article, I will share with you a step-by-step guide on how to do it.
Gathering the Tools and Materials
Materials:
- Replacement charcoal filter (make sure to buy the correct one for your specific Samsung microwave model)
Tools:
- Screwdriver (either a Phillips or a Torx, depending on your microwave model)
- Cleaning solution or warm soapy water and a sponge
Now that we have gathered all the necessary tools and materials, let’s move on to the actual process of replacing the charcoal filter in your Samsung microwave.
Locating the Charcoal Filter
The first step is to locate the charcoal filter in your microwave. In most Samsung microwaves, the filter is situated at the top or side of the appliance. Refer to your microwave’s user manual to find the exact location if you’re unsure. Once you’ve identified the filter’s location, you can proceed to the next step.
Removing the Old Charcoal Filter
Step 1: Unplug the Microwave
Before starting any work on your microwave, it is crucial to unplug it from the power source. This step ensures your safety and prevents any unwanted accidents.
Step 2: Open the Microwave Door
Open the microwave door and locate the grill at the top of the appliance. Most microwaves have a removable grill that covers the charcoal filter. Look for any screws or clips that may be securing the grill in place.
Step 3: Remove the Grill
Using the appropriate screwdriver, carefully remove the screws or unclip the grill. Set the grill aside in a safe place until you need to put it back later.
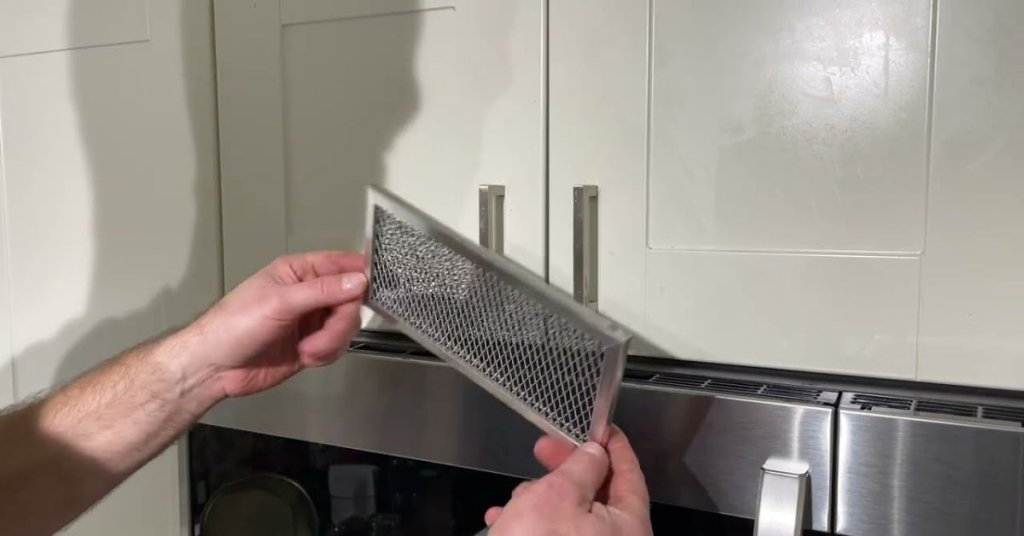
Step 4: Take Out the Old Filter
Once the grill is removed, you will see the old charcoal filter. It’s usually a rectangular or cylindrical shape with a black or gray color. Gently slide or pull the filter out of its compartment. If the filter is secured in place with clips or tabs, release them to remove it completely.
Installing the New Charcoal Filter
Step 1: Clean the Filter Compartment
Before installing the new charcoal filter, it is essential to clean the filter compartment. This step ensures optimal performance and prevents any residue or debris from affecting the filter’s efficiency. Use a cleaning solution or warm soapy water and a sponge to wipe down the compartment thoroughly. Allow it to dry completely before proceeding.
Step 2: Insert the New Filter
Take the new charcoal filter out of its packaging and carefully insert it into the filter compartment. Ensure that it fits securely and snugly into place. If there are any clips or tabs on the filter, make sure to fasten them to keep the filter in place.
Step 3: Replace the Grill
Once the new filter is in place, it’s time to put the grill back on. Align the grill with its original position and reattach the screws or clips that were holding it. Double-check that it is securely fastened to prevent any rattling or movement during operation.
Step 4: Plug in the Microwave and Test
Now that the new charcoal filter is installed, plug your Samsung microwave back into the power source. Close the microwave door and test it by heating a small cup of water or running a quick test cycle. Check for any unusual smells or noises to ensure that the new filter is working correctly.
Replacing the charcoal filter in your Samsung microwave is a relatively simple task that can be done in just a few minutes. By following these steps, you can save the cost of a service call and ensure that your microwave continues to function efficiently. Remember to refer to your microwave’s user manual for any model-specific instructions or precautions. Enjoy fresh and odor-free cooking with your newly replaced charcoal filter!